
Working from Heights
Languages: English
Media Editing: This subject does not contain any editable media.
Description: When working from heights, falling is always a serious risk. Even if it's only a short distance, or if you don't hit the ground, falling can cause serious injuries. Decrease the risk of incidents by learning what a personal fall arrest system is, how to inspect it, and how to properly and safely use it. Knowing and properly implementing fall prevention best practices can be the difference between non-critical injuries and a tragedy. Content is intended to support OSHA training requirements for proper use of personal fall protection harnesses and lanyards only.
Topics
How to Inspect Your Personal Fall Arrest System
-
Learners are taught the key pieces of their personal fall arrest system, how to inspect it and recognize signs of damage that compromise the strength and integrity of their equipment. They are also taught proper procedures in handling these items.
-
Questions (level 1, 2, 3)
-
This topic is currently available in English.
-
There are three key parts to a personal fall arrest system: the anchorage system, the connecting device, and the body harness. Each is vital to the system and help keep employees safe.
Always inspect the connecting devices of your personal fall arrest system to make sure they work properly BEFORE you use them.
Look for torn stitching, cuts, tears, frays, burns, or chemical damage which can compromise the strength of your connecting devices.
Inspect the hook and keeper gates of the connecting devices for any cracks, nicks, bends, or distortions. Any damage could mean the hooks won’t work properly and might disengage or roll out. These devices should not be used, and they should be taken out of rotation.
Inspect the connecting device for indications that it’s been involved in a fall, like elongation of the lanyard.
Any lanyard, fall limiting device, or snap hook involved in a fall must be marked with an impact indicator, like a red tag or tape. This is a visual signal to let everyone know it is damaged and its strength is compromised. The equipment should then be taken out of rotation.
Body harnesses need to be inspected for damage that could compromise its strength and integrity, like damaged webbing, torn stitching, burns, chemical damage, and distorted buckles and D rings.
Inspect the body harness for any indication that it has been subjected to a fall. It is standard practice to take any equipment involved in a fall out of rotation, as they are not meant to withstand the impact of multiple falls.
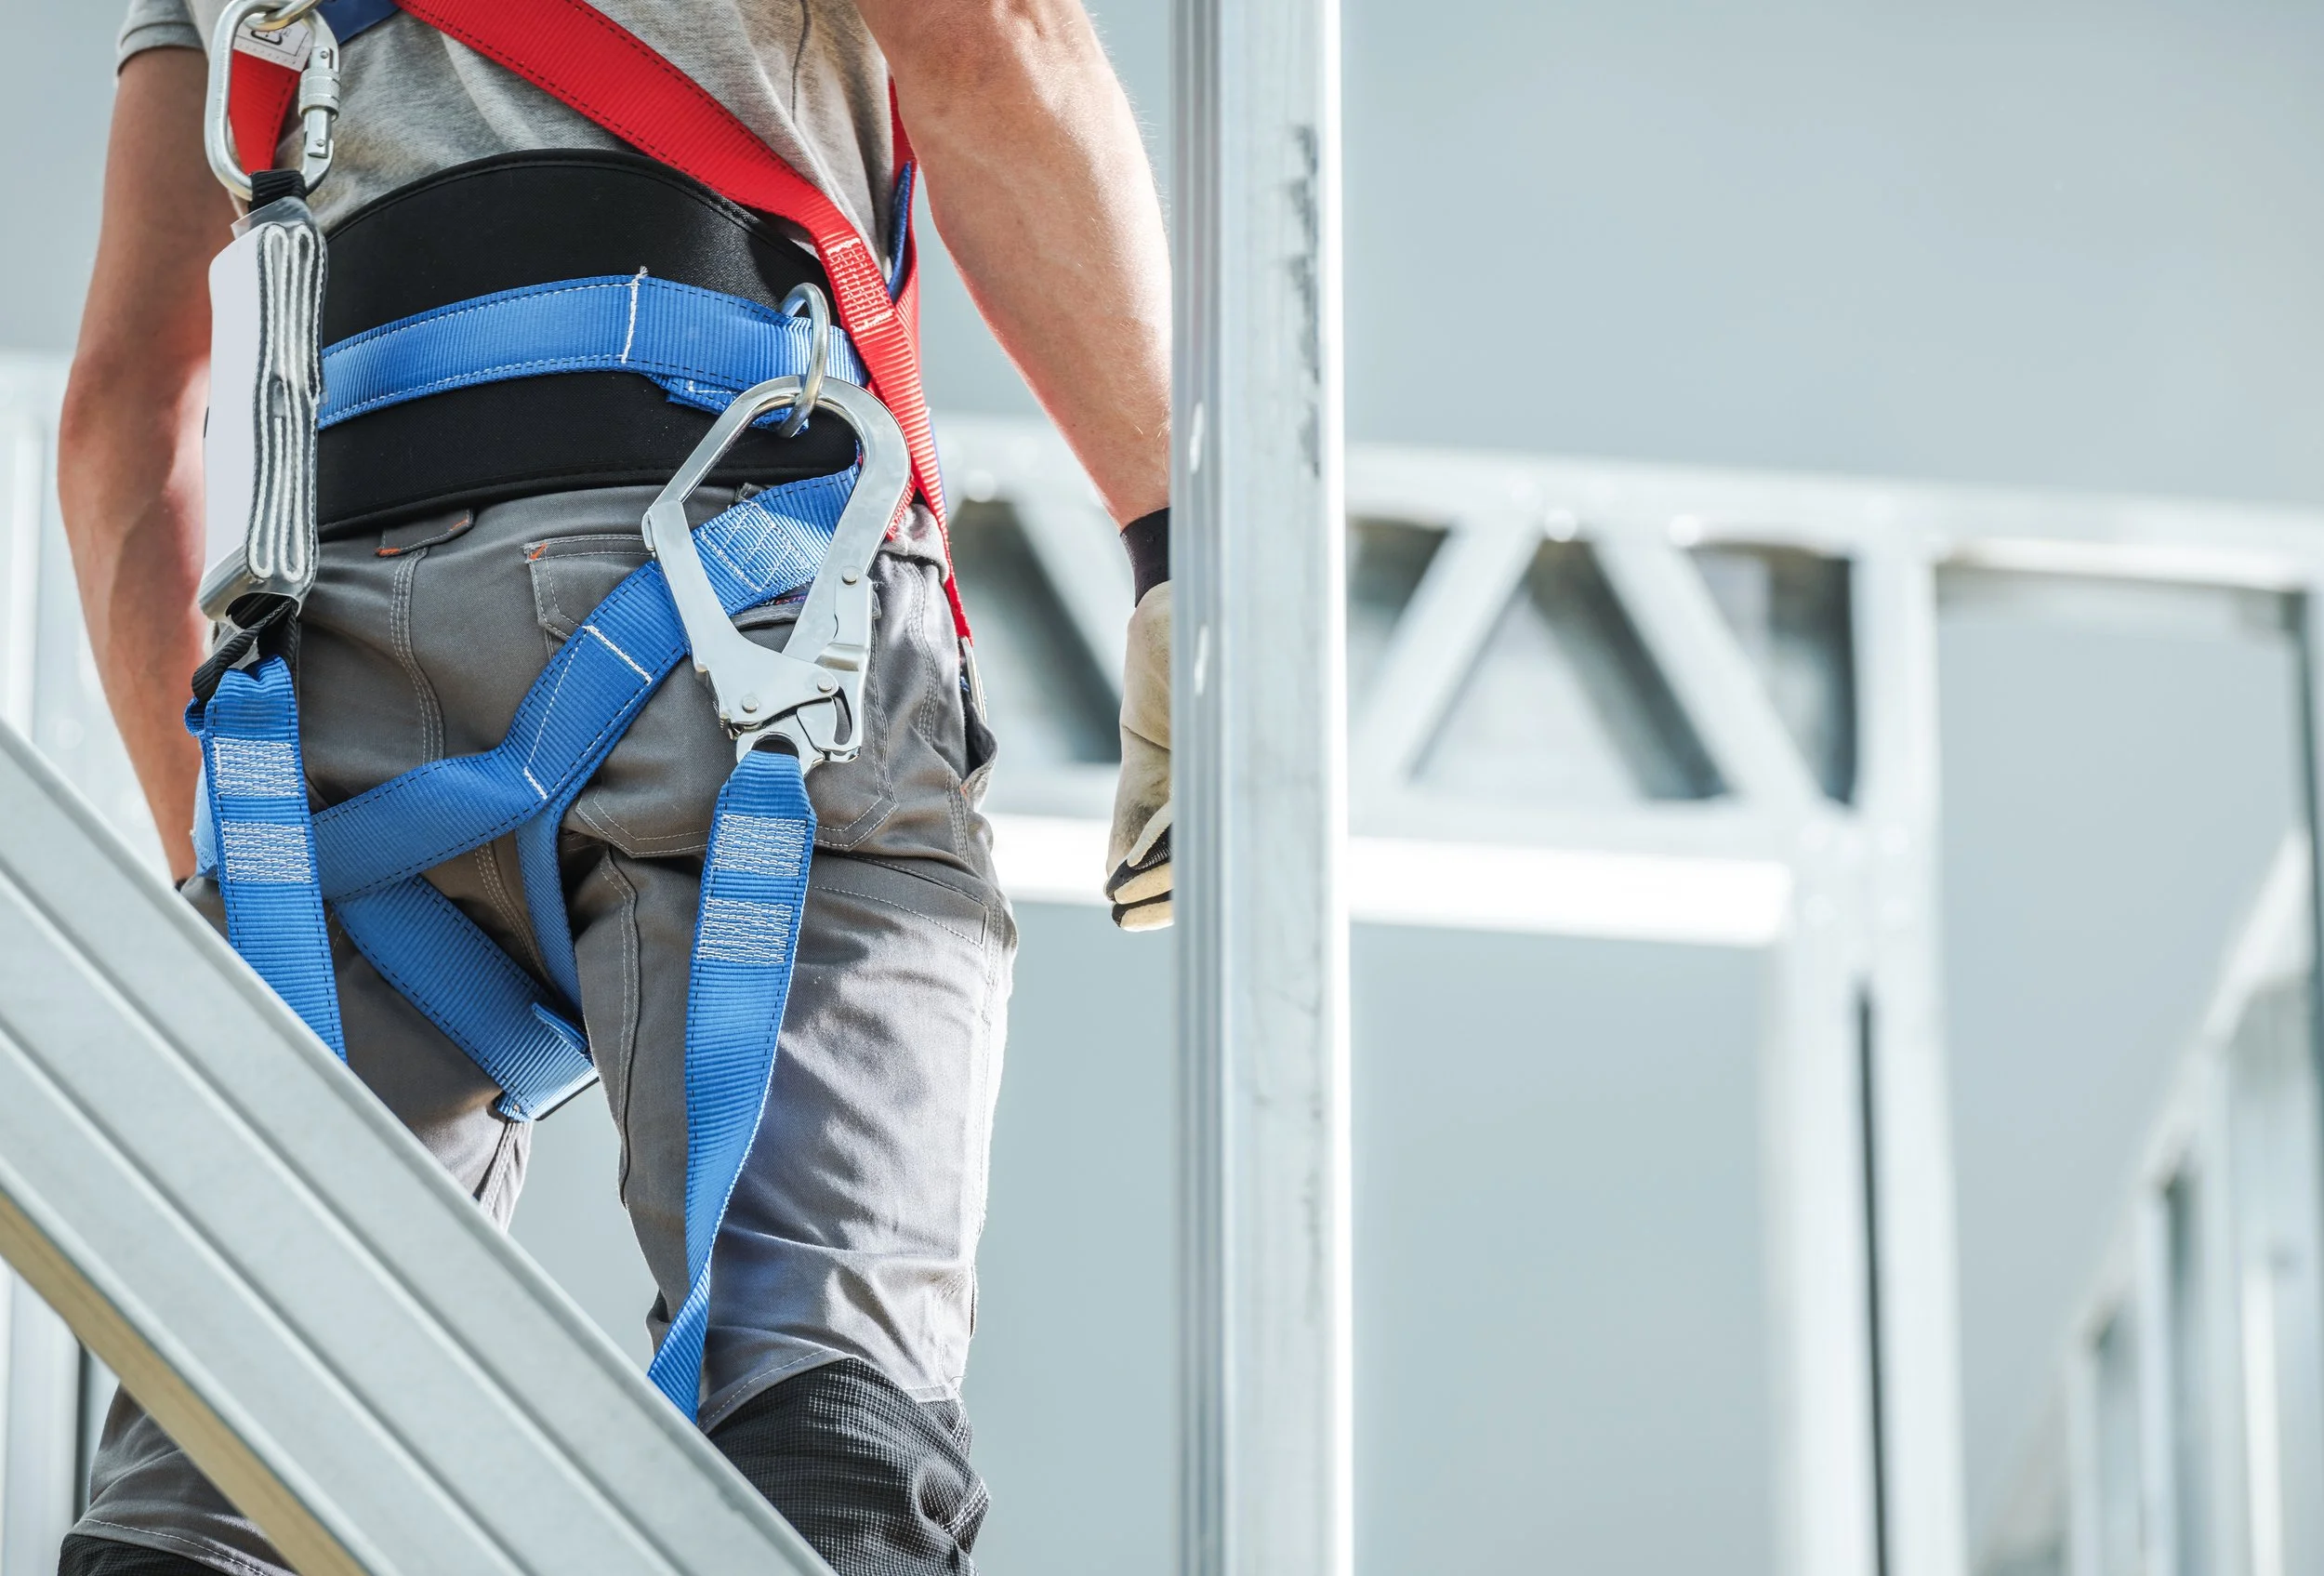
Preview of topic image for “How to Inspect Your Personal Fall Arrest System” as this topic is questions only.
Using Your Connecting Device Safely
-
Learners are taught the different connecting devices and lanyards, and when and how they should be worn. It covers how to follow federal safety requirements, best practices to keep connecting devices working and how to avoid making common mistakes.
-
Questions (level 1, 2, 3)
-
This topic is currently available in English.
-
The connecting device attaches the body harness to the anchorage system and is critical in stopping the worker’s fall.
There are many types of connecting devices. The main types include simple single lanyards, y-shaped lanyards that allow workers to move easily between anchorage systems, and retractable lanyards (also called self-retracting lifelines) that are used when workers must move away from the anchorage system.
According to federal safety rules, connecting devices must be labeled with their weight capacity and be able to support 5000 lbs of dead weight.
Never cross your lanyard over a beam or another object, and then tie or reconnect it with itself. This tears or saws away at the material and compromises its strength.
Never connect a lanyard to itself because it reduces its strength by half.
An anchor sling is a strong, sturdy strap that is designed to connect a lanyard to a beam. Use the anchor strap instead of connecting the lanyard to itself, which can damage or cut the lanyard.
Federal safety regulations require that connecting devices must have a double-locking snap hook. A double-locking snap hook requires two separate movements to open, making it less likely they’ll accidentally open and disengage from the anchorage system.
Snap hooks should only be attached to an approved compatible anchorage system. This helps prevent accidental disengagement and keep the hooks oriented correctly.
Never connect a snap hook to incompatible devices like rope or webbing, wire rope, directly to a horizontal lifeline, or to another snap hook because they are not designed to be connected to these items safely.
Never connect two snap hooks into one D-Ring because the D-Ring is designed to accommodate one snap hook.
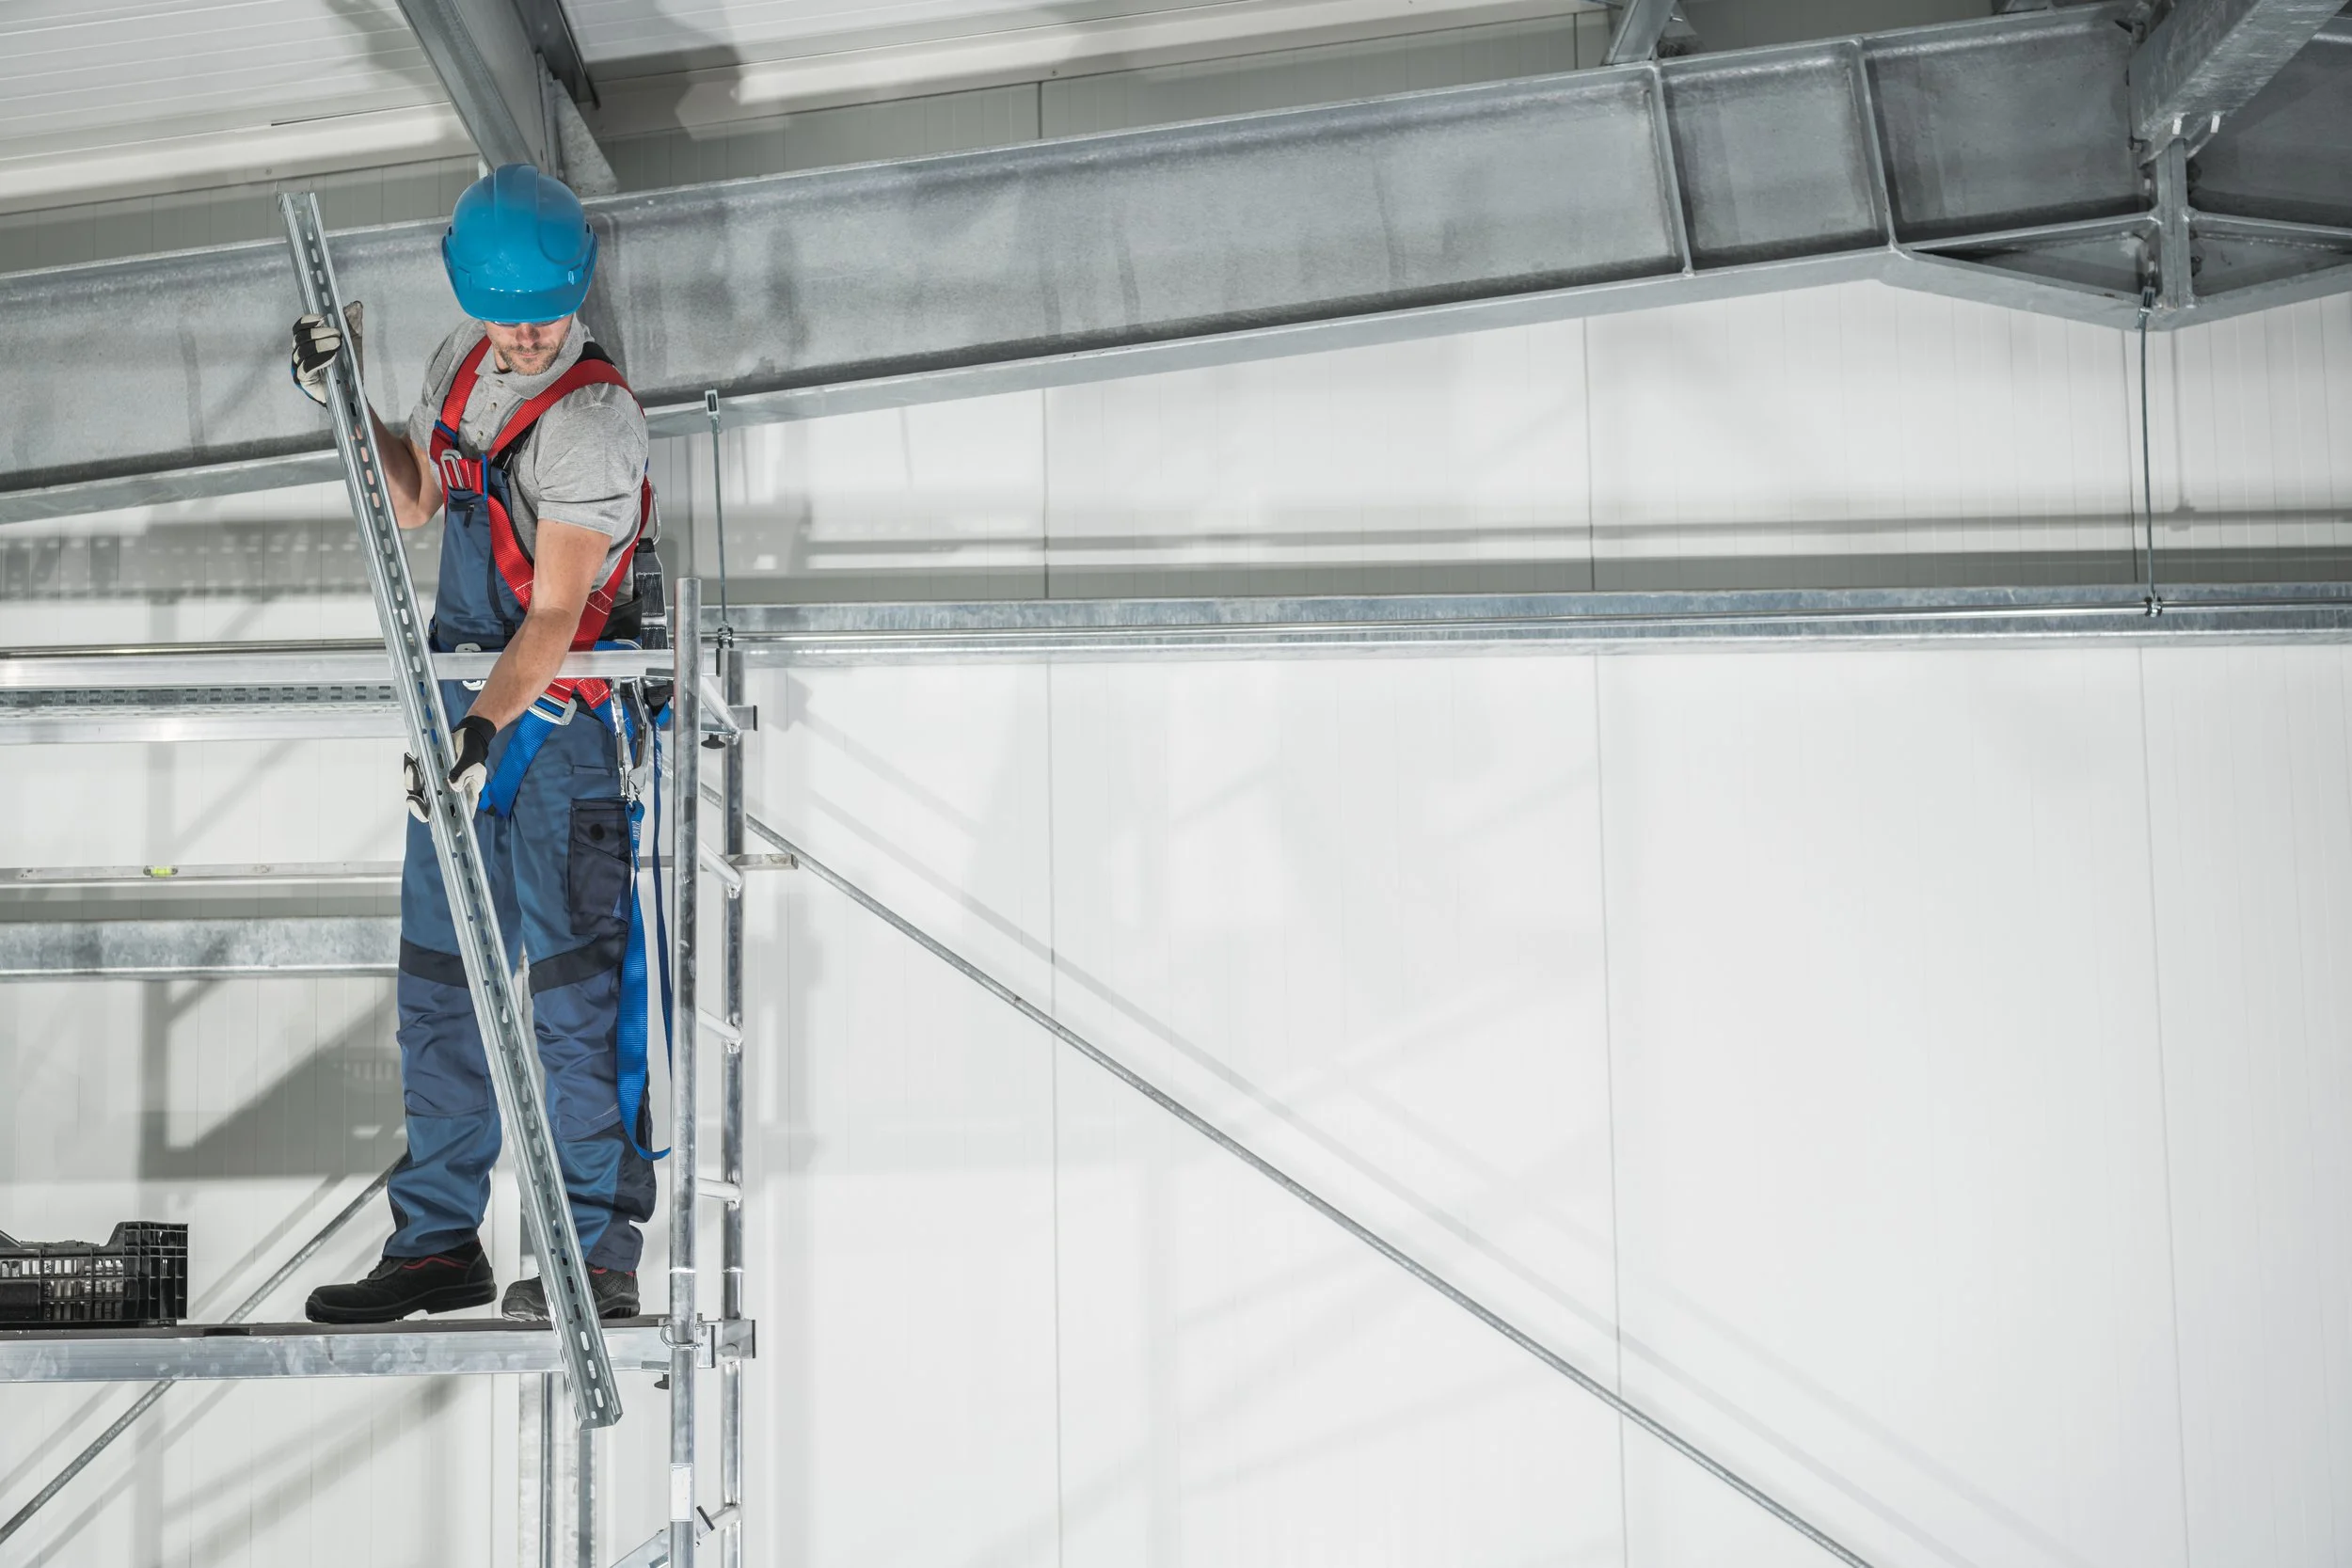
Preview of topic image for “Using Your Connecting Device Safely” as this topic is questions only.
Putting on Your Body Harness
-
Learners are taught key steps/what they should do before putting a body harness on, how to wear it properly, and how to safely secure all the components to their bodies. Learners are also taught about federal safety requirements for body harnesses.
-
Questions (level 1, 2, 3)
-
This topic is currently available in English.
-
To reduce injury to the worker, the body harness is designed to spread the force of the fall over a large area of the body, so no one area absorbs the full force of the impact.
Most body harnesses are equipped with foot-holds which create a support platform in the event of a fall. The platform helps the fallen worker support their weight and remain upright.
Inspect your harness before every use to make sure it’s in good condition and working properly.
Before putting on a body harness, find the D-ring on the back and gently shake out the harness so you can find the straps easily.
When the body harness is hanging in the right shape, put your arms through the straps, like you would put on a vest.
After putting on your body harness, pull the leg straps around your legs, and tighten them until they are snug. If you fall with loose leg straps, you can cause serious injury to the groin area.
Once your body harness is on, and you’ve put on and tightened the leg straps, tighten the chest strap around the middle of your chest.

Preview of topic image for “Putting on Your Body Harness” as this topic is questions only.
Choosing the Right Connecting Device
-
Learners are taught the different types of lanyards and how they help to reduce and absorb the force of a fall. It also covers how to calculate total fall distance before working to ensure proper lanyard length and some federal safety requirements.
-
Questions (level 1, 2, 3)
-
This topic is currently available in English.
-
An energy-absorbing lanyard reduces the impact to the user’s body if they fall from a height.
In the event of a fall, a special section of an energy-absorbing lanyard will tear and elongate. This special section absorbs the impact of the fall and slows the rate of descent until the worker comes to a controlled stop.
In the event of a fall, a self-retracting lifeline limits the distance the worker will fall and helps reduce the impact of the fall.
Self-retracting lifelines allow more mobility for the worker because it lets them move further away from the anchorage point. In the event of a fall, a locking mechanism and deceleration device is activated, which quickly stops the fall.
There are two classes of self-retracting lifelines. Class A self-retracting lifelines will stop a fall within two feet; Class B self-retracting lifelines will stop within 4.5 feet.
Where there is any risk of falling, it is important to calculate the total fall distance to avoid hitting the ground. This distance is the maximum distance a worker will fall from the anchorage system.
When calculating the total fall distance, add the worker’s height, the lanyard length, and the elongation length braking distance together.
Federal safety rules require that the maximum elongation or deacceleration distance of an energy-absorbing device is 42 inches, which is 3.5 feet.
Ex: the total fall distance for a six-foot worker, wearing a six-foot energy absorbing lanyard, with a designated elongation of 3.5 feet = 15.5 feet. 15.5 feet + an extra 3 feet for safety = anchorage system must be at least 18.5 feet high for the 6-foot worker.
Use measuring tools, like a tape measure, to make sure you have the correct height of the anchorage system before working. You need the right measurements to make sure you don’t hit the ground if you fall.
When setting the anchorage system point, add a three-foot safety or buffer space; this buffer space will help avoid colliding with the ground if you fall.
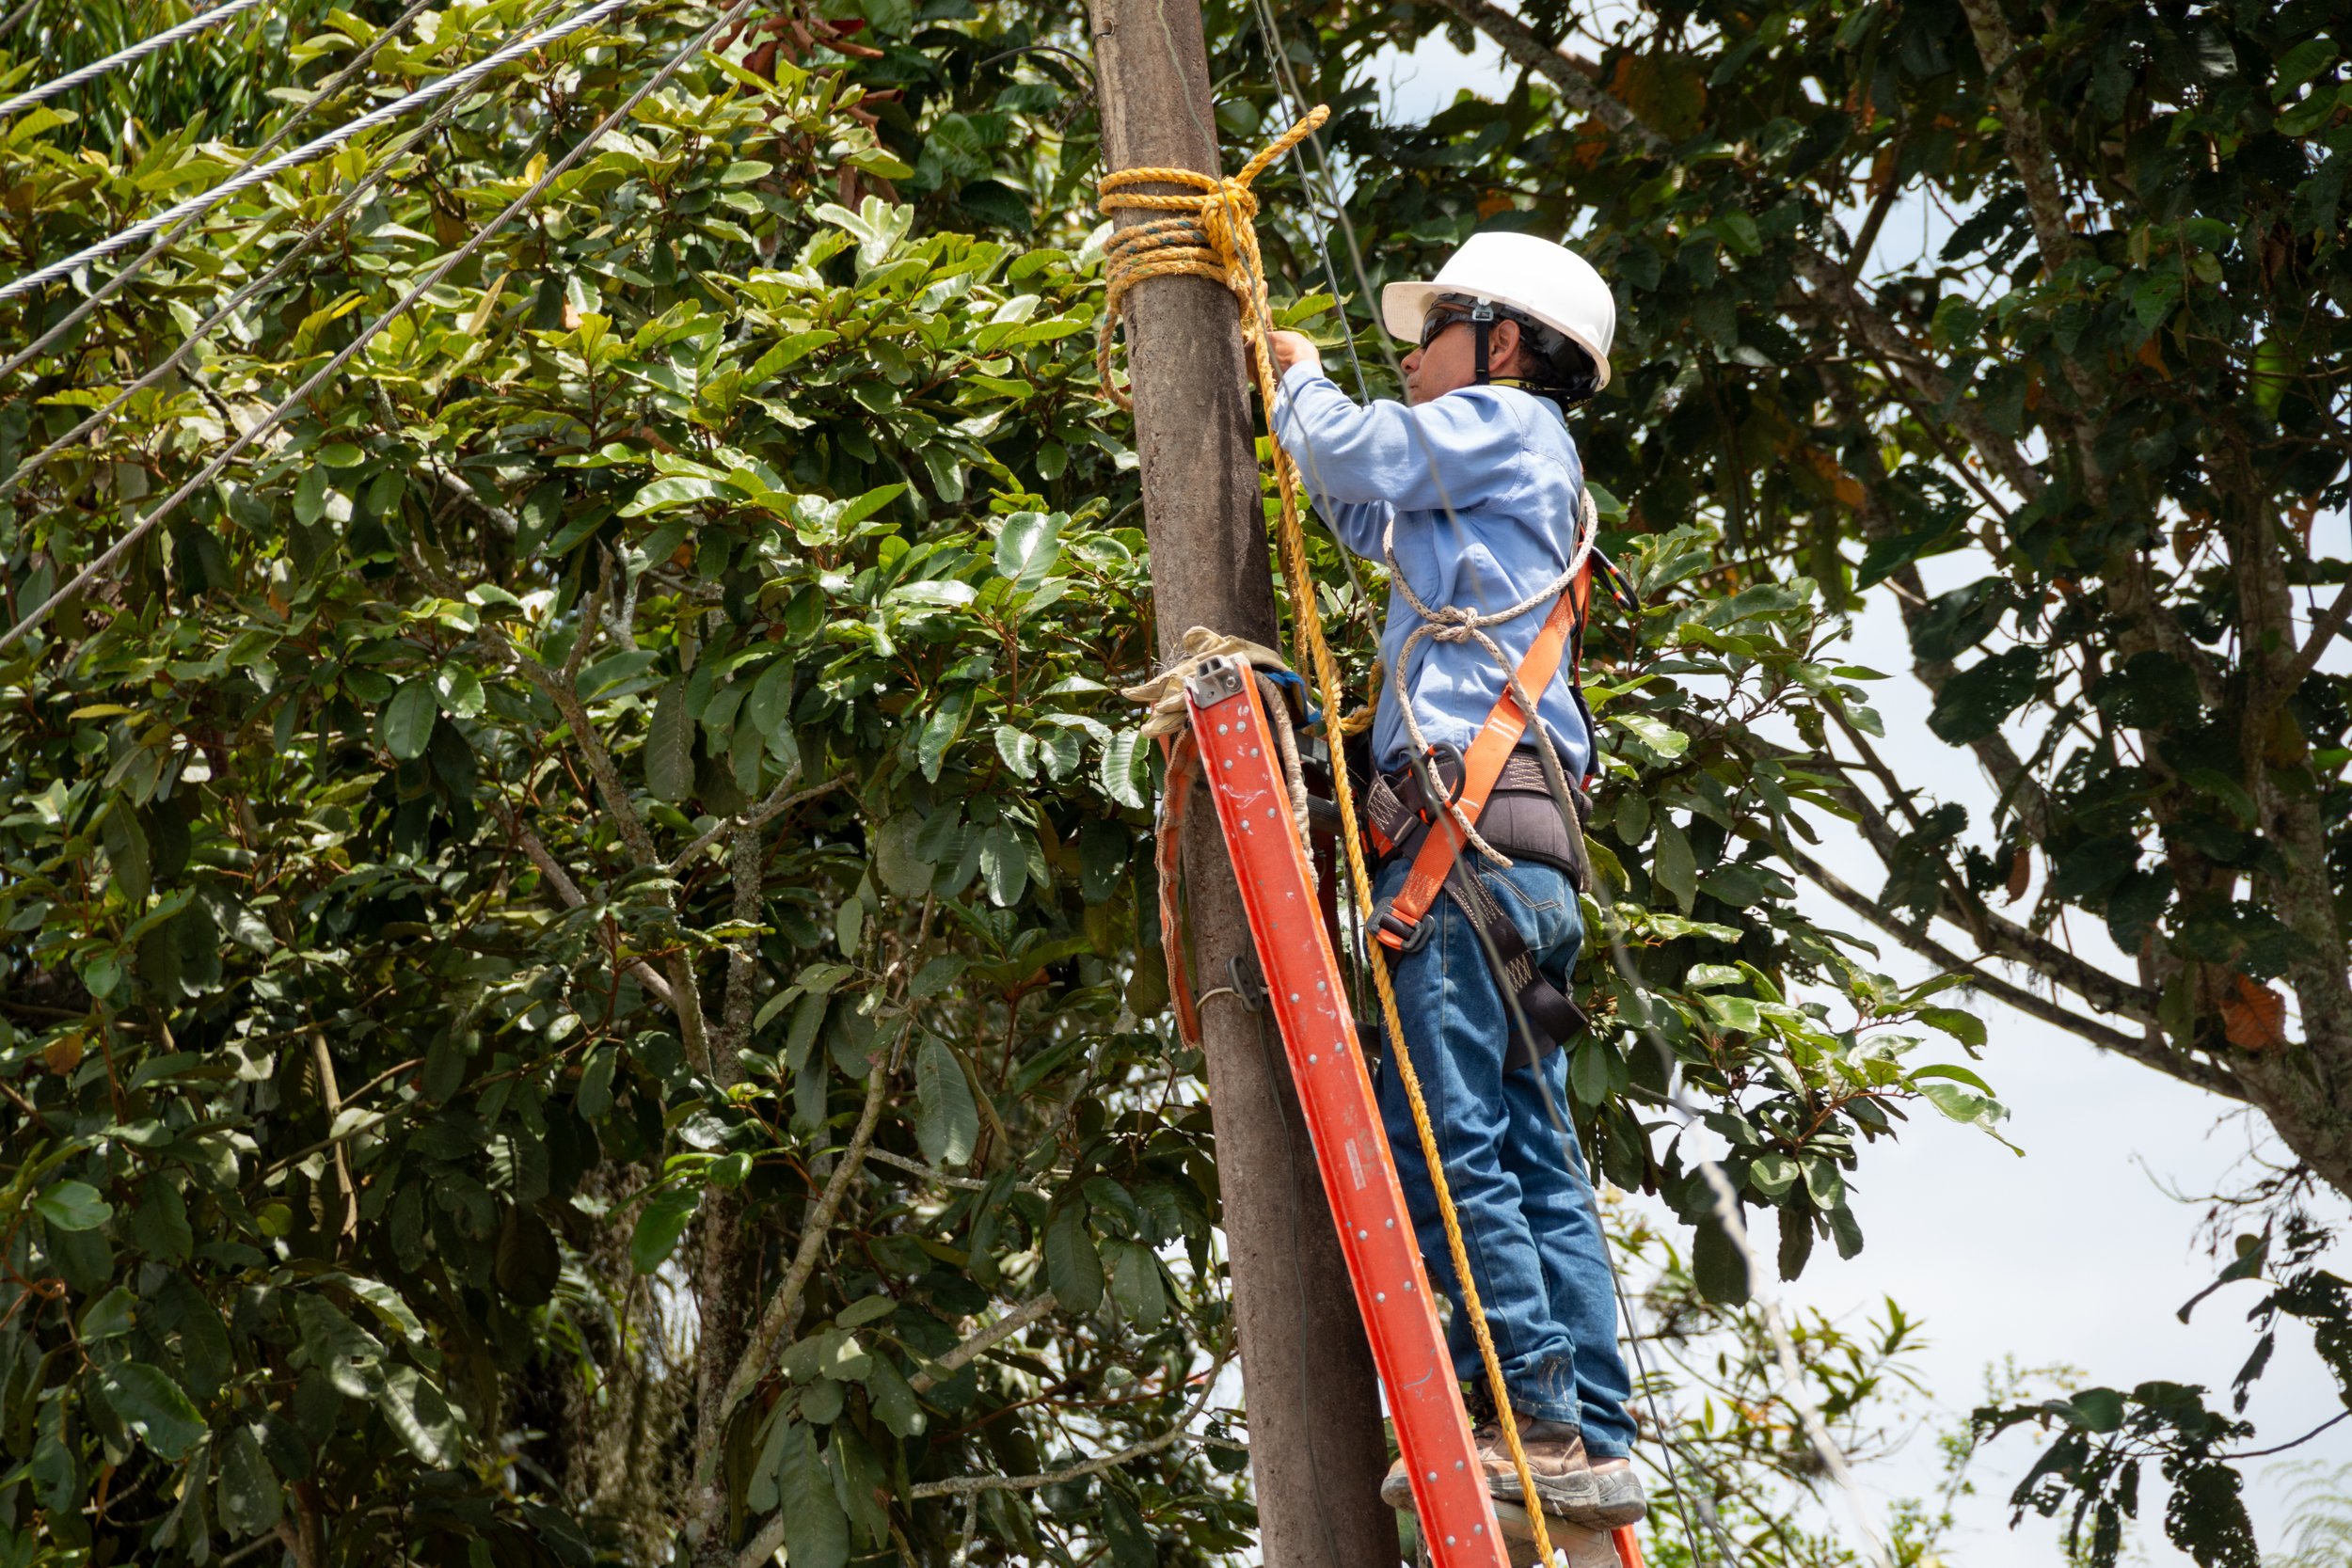
Preview of topic image for “Choosing the Right Connecting Device” as this topic is questions only.


